Gingerbread house creating, decorating sugar cookies, pumpkin pie, etc., are all yummy treats we enjoy during the holiday season! Sometimes, the same desserts eaten repeatedly can get boring and cause them to lose excitement! This would be a Christmas crime! As Christmas approaches, people all over the world start to prepare. One of the essential parts of Christmas is food. While traditional dishes are great, sometimes switching things up and trying something new is fun. This article will show you how to up your gingerbread house decorating skills. These desserts are sure to impress your family and friends and add some extra holiday cheer to your Christmas celebration. With a bit of creativity and planning, you can make these houses and enjoy the process. Here are our favorite creative holiday gingerbread decorating tips to make while you wait for Santa. You can purchase two types of gingerbread houses: disassembled and assembled. A disassembled gingerbread house means you will receive all four sides of the house separated from each other and not put together. An assembled house means just that, assembled so all that you’re left to do is decorate. There are great things about each type of gingerbread house and decorating perks that set each one apart.
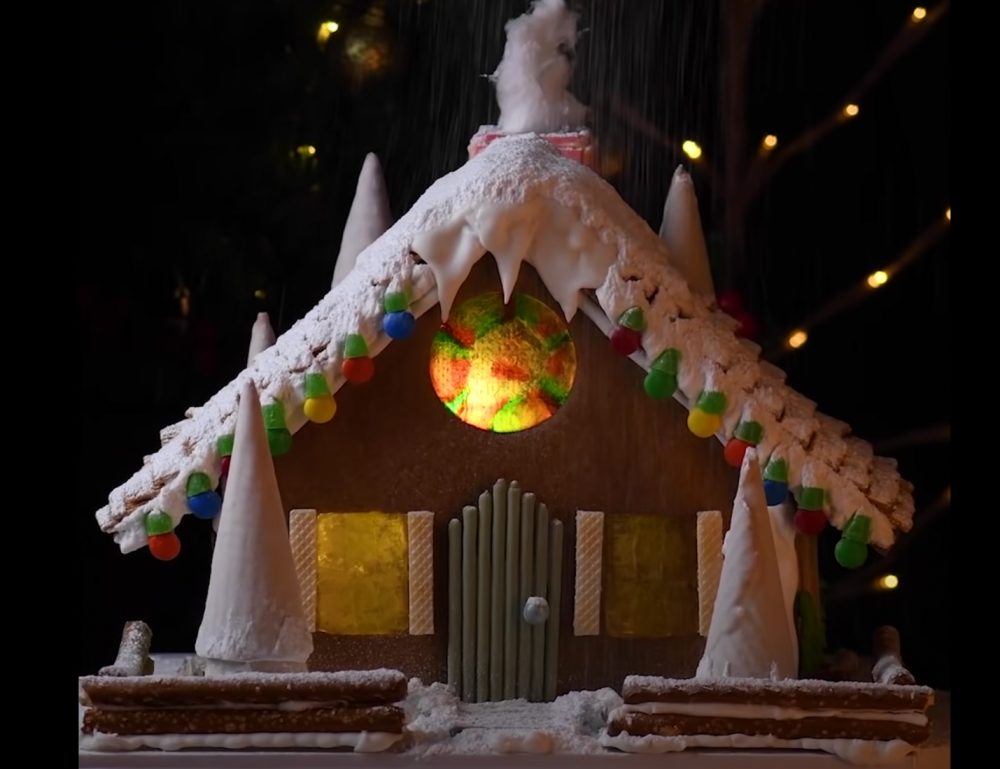
Disassembled
Not your Classic Gingerbread House
You can watch this YouTube clip to see how they made this complex, cozy, and not-so-complicated gingerbread house!
You will need:
- Gingerbread house kit, disassembled
- Cardboard for the base
- Gummy bears
- Green Pocky sticks
- Extra frosting
- Vanilla sugar wafers
- Sprinkles
- Laffy Taffys
- Golden Grahams
- Rice Krispie treats
- Cinnamon gum
- Mike & Ike’s
- M&Ms
- Ice cream cones
- Powdered sugar
- Pretzel sticks
- Cookies and Cream chocolate bar
They bought a pre-made gingerbread house (not put together), placed the outside pieces on a cookie sheet, and melted gummy bears in the window. This creates a unique stain-glassed effect, even though it’s as simple as 1-2-3! Next, they placed eight staggered, green Pocky sticks, glued them together with frosting, and placed them on the front gingerbread piece for the door. Then, using frosting for glue, line the windows with pulled-apart sugar wafers, and add a sprinkle to the door, making a knob. Next, you will want to cut up green Laffy Taffys in Christmas tree form and glue them to the front of the house.
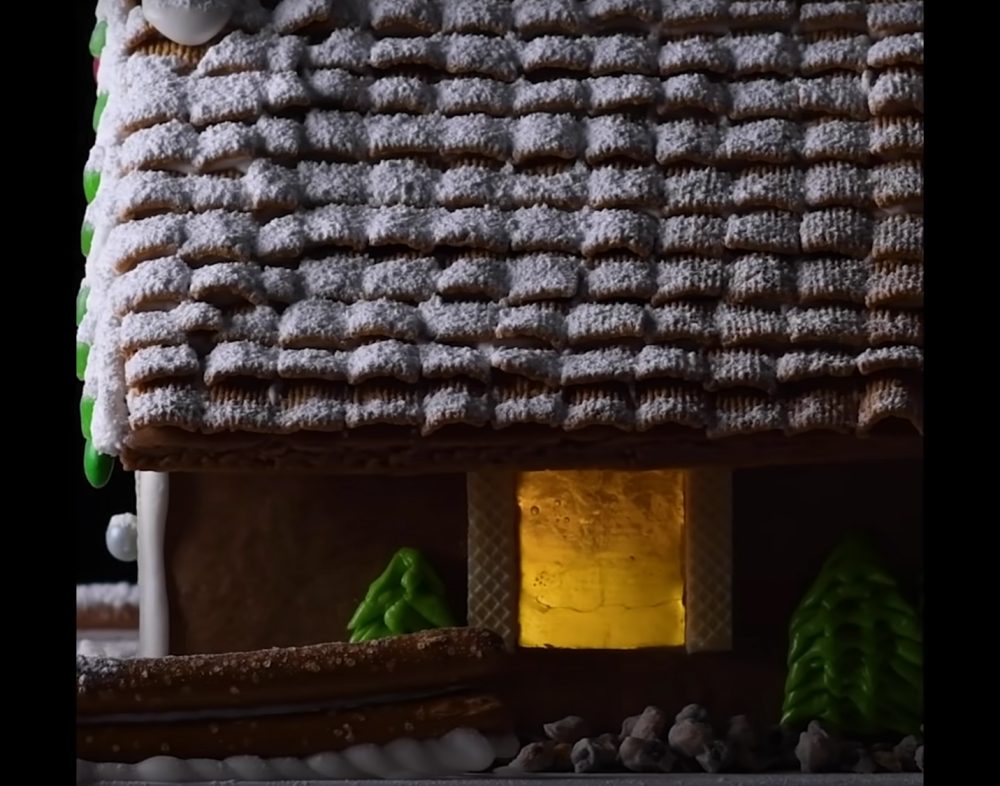
For the roof, spread a line of frosting, one line at a time, and place one square of golden grahams until you have a perfect, sugary, shingled roof. At this point, you will have decorated each disassembled piece of your gingerbread house and are ready to glue it together! To glue it together, draw a square with your frosting on a piece of cardboard and carefully stick the bottom of each piece on. Use a can on each side of each piece to hold it together in place while you wait for the frosting to set. When you add the sides and back of the gingerbread house, don’t forget to add frosting to its connecting side, so it will all stick together and harden nicely. After the sides, front, and back set, squeeze frosting on the top to add the roof and hold in place until secure.
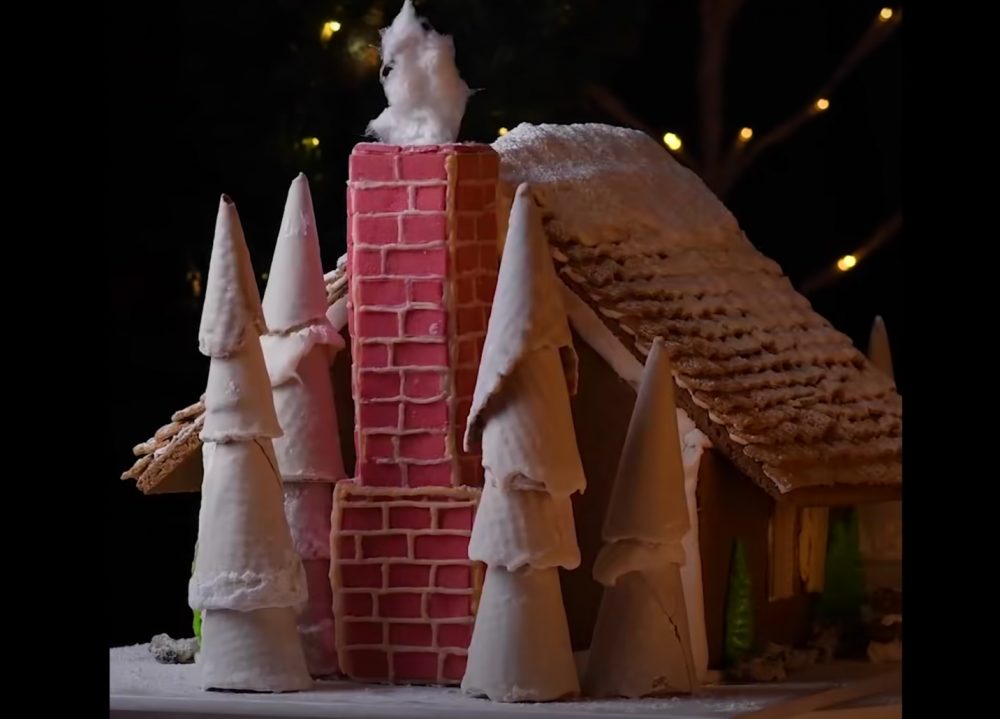
For extra pizzaz, cut rice Krispy treats in a chimney shape, add frosting, and use cinnamon gum to make bricks, forming a realistic chimney. To make Christmas lights, cut a green Mike & Ike in half and stick it to one M&M. Several of these will create a string of lights you can fasten to your gingerbread house! To make a realistic-looking snow-capped tree, take an ice cream cone, submerge it in frosting, then dip it into powdered sugar. Place these on the cardboard next to your gingerbread house for a completed sugar-coated landscaped home! If you want to fence in your beautiful creation, take thick pretzel sticks and use frosting as the mortar for a fence. Don’t forget to line your entryway with thick frosting and add a broken-up cookies and cream chocolate bar for a sidewalk. With all the extra frosting, pour some on your roof for a realistic snow-capped roof with icicles dripping off the edges. To top it off, sprinkle powdered sugar over the scene, ensuring a sugary winter wonderland. Finally, sneak a battery-powered timer tea light inside your dreamy gingerbread house for a final touch!
Assembled
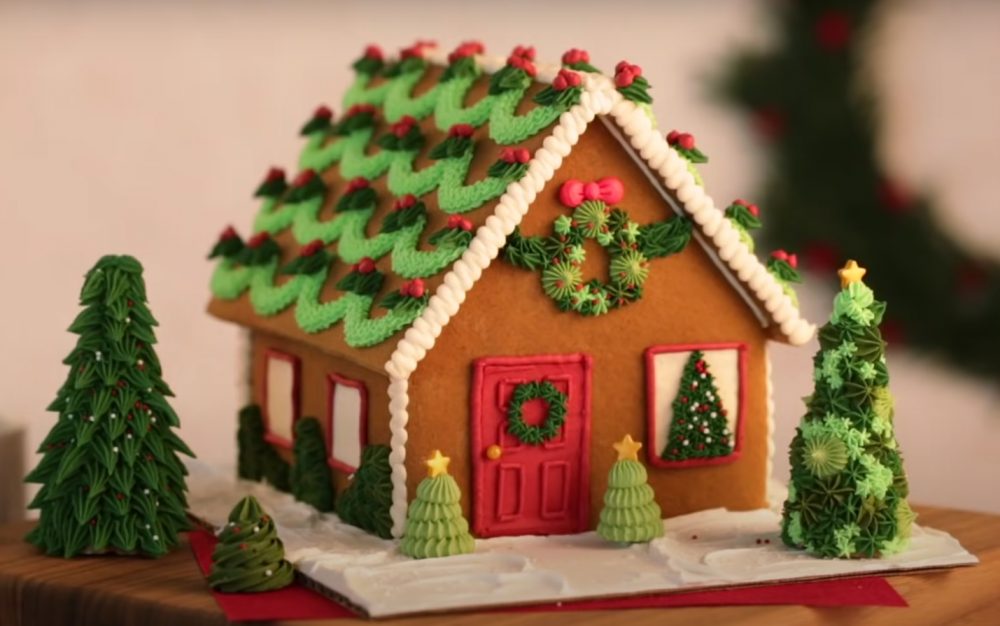
An assembled gingerbread house is decorated differently than the disassembled one above. This is not better or worse but uses different techniques. Royal icing is the best icing to decorate with, and it will last all season long. You can make your own royal icing or buy it premade. To customize your colors, start by separating the royal icing into different piping bags and add different food coloring to it. Whether you want a classic red, green, and white Christmas theme or create your own color palette, making your own colored royal icing ensures a unique gingerbread house. After putting each color in the piping bag, cover the tips with a damp paper towel to prevent it from crusting over, and seal it with a rubber band at the end of the bag so it won’t fall out. If you have several different frosting tips, practice piping with your new tips on a paper plate and discover what designs each one creates. This way you can use the proper tip to decorate your gingerbread house in the best and easy way possible!
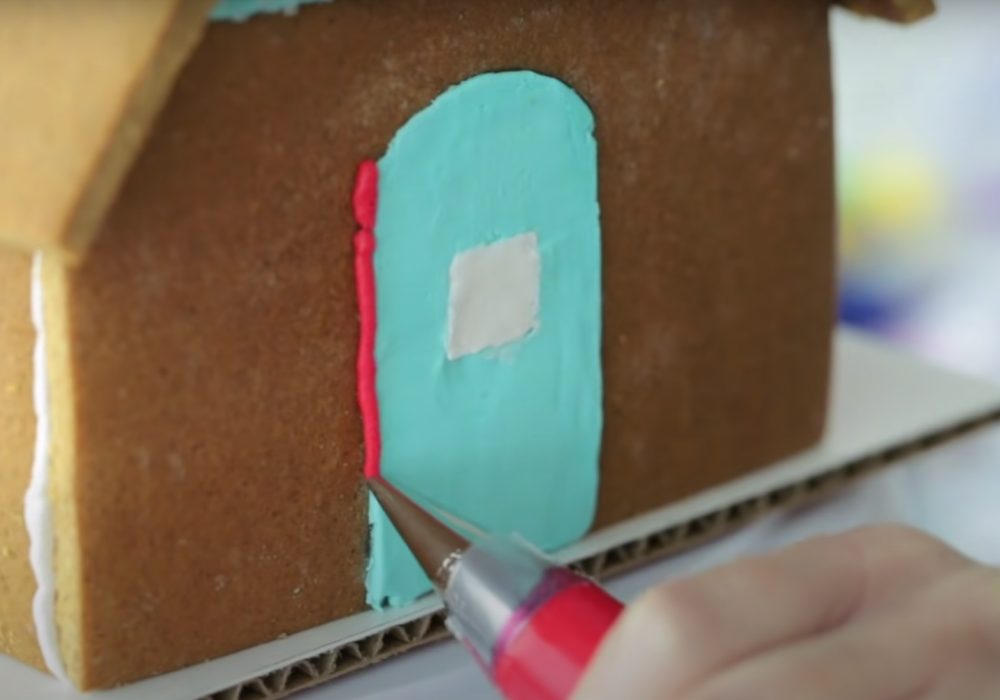
Since you will be creating flat, straight lines on a vertical surface, it’s important to squeeze the piping bag slowly and touch it to the gingerbread house. You can create door frames and windows with this technique! Use a round tip for a nice flat, straight, or curved line.
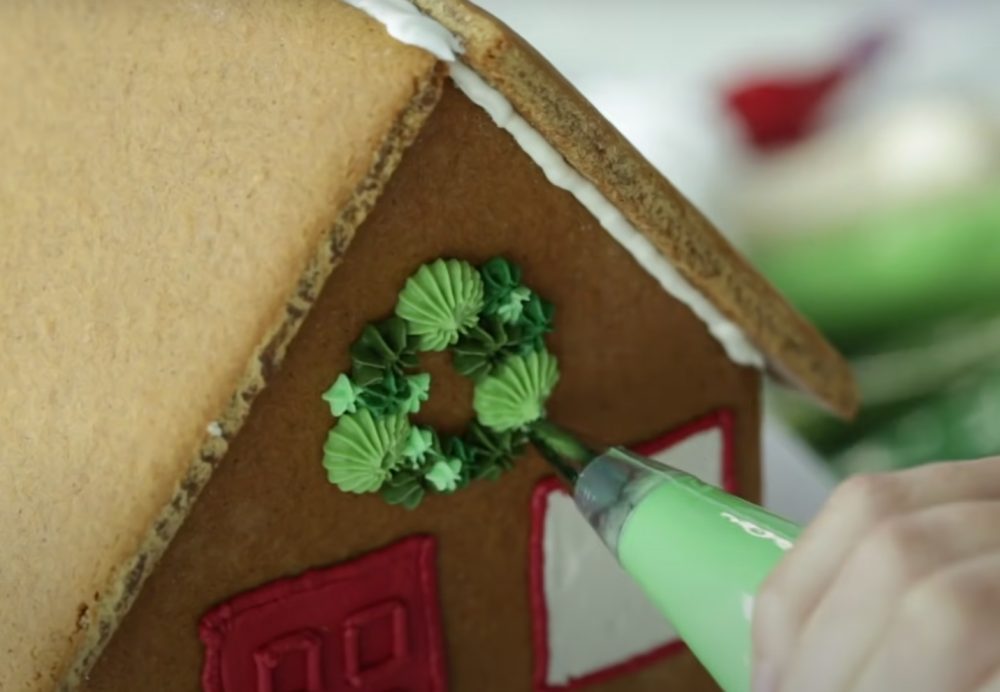
To make a wreathe, choose any star tip and hold the bag straight out with the tip slightly off the surface. Next, make several “stars,” one next to the other in a circular wreathe shape. If you want a full-looking wreathe, pipe different size stars inside and outside the wreathe circle to fill it in from all angles.
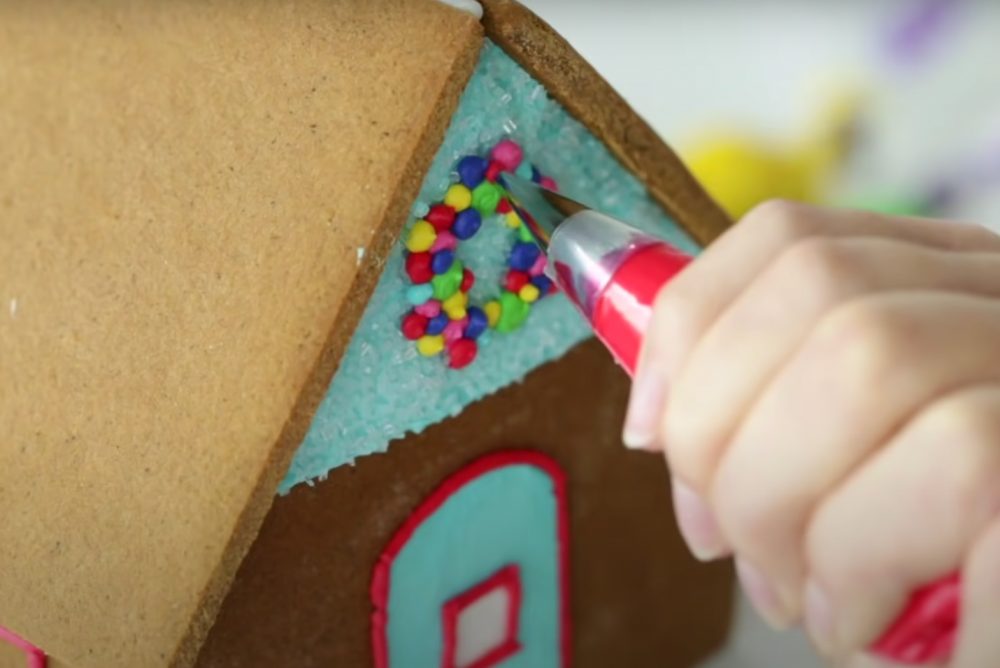
To make a unique pom-pom wreathe, use the round tip with different colored icing combined with the above technique!

To make a simple garland, you will want to mark ahead of time little dots so you will have even spaces between each loop. Then, simply start squeezing your round-tipped piping bag, touching it to the surface at the beginning and letting it droop between each marked dot. This is an easy way to make garland on your gingerbread house. To make a large garland to fill in the empty space on the roof, make your own stencil by cutting it out of paper and then tracing it on your gingerbread house roof with an edible food marker! Use a thick star tip as you follow your lines on the roof and use the same touch-and-drop technique from before, except you can add squiggle lines to accentuate the star pattern as you trace your pattern.
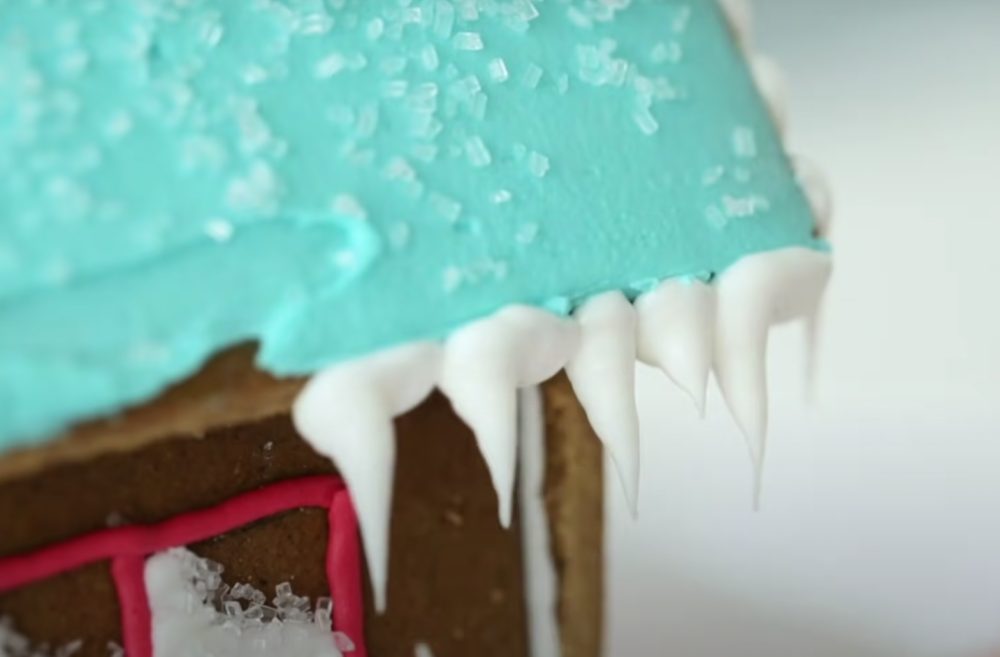
After you complete the sides and the roof, let’s add some icicles to complete it. Any small, round piping tip will work. Hold your icing bag with the tip up, squeeze in one place, and then pull the tip down slowly and watch the icing drip in true icicle fashion! Make sure to make each icicle different, some thin, some thick, long, and short, for a more realistic look. You can also create a thick snowy trim by making a zip zag motion like our roof garland, but all along the side of the house.
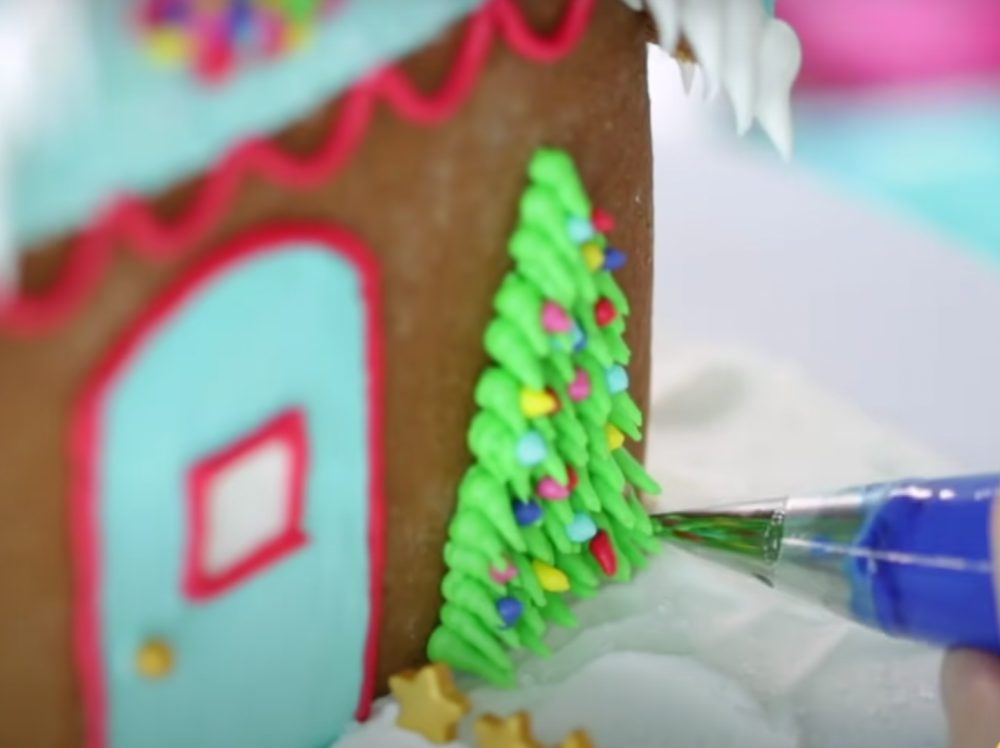
Now that the house is complete, it’s time to decorate the yard! Cover the cardboard the house is on with thick frosting. An angled spatula will best spread it all around. Then, add sparkling sugar to mimic freshly fallen snow. You can create a walkway up to the store by lining it with frosting and placing sprinkles or small gold stars. You can also pipe a Christmas tree next to the front door by creating small dots in a large triangle up the house. You can then add colored dots to it to mimic Christmas lights. Finish your Christmas tree with a gold star! Just like creating a Christmas tree, pipe dark green frosting with a star tip to create shrubs on the sides of your house. Add some “Christmas lights” or sprinkles to add a finishing touch. To make a 3D Christmas tree, pipe frosting on parchment paper like you would on top of a cupcake; start in a circle and slowly pile it on in a tight, round motion. Let it dry overnight so you can easily place your 3D Christmas tree next to your gingerbread house for the final touch.
Whether you have a disassembled or already assembled gingerbread house decorating kit, there are several simple techniques you can do to add to its Christmas jolly spirit! Additional candy, cereal, powdered sugar, and loads of extra royal icing will ensure a unique and fun time decorating your gingerbread house as you wait for Santa! Of course, this would be an excellent project for your kids too, or you can even host a gingerbread decorating party.
Videos & photos:
- https://www.youtube.com/watch?v=vFyPazAvmgM
- https://www.youtube.com/watch?v=C1heIAPMNn8


Recent Comments